 Click to call
How to Fix Your Garburator
Has your garburator suddenly stopped working? Or has it slowly conked out over time?In this article we’ve outlined common issues, how to fix a garburator, and how to properly use your appliance to avoid future problems.:
- Common Garburator Issues
- Simple Steps for Fixing Your Garburator
- When to Contact a Professional for Garburator Repair
- How Do I Properly Use a Garburator?
Common Garburator Issues
Garburators are heavily used appliances, so it’s not a surprise when they develop problems. Here are a few of the most common garburator issues we see:
- Failure to turn on: This issue often arises from a problem with the outlet or an improper garburator setup. Sometimes, this can be repaired using the reset button on the bottom of the appliance.
- Garburator hums but doesn’t turn: Usually, this happens when the garburator blades are jammed (which is different from a clog). To repair this, use a hex wrench to manually turn and release the blades.
- Leaks: A leaking garburator has a few possible causes: the sink flange, the dishwasher connection, or the discharge drainpipe. In all cases, you’ll need to repair the connection to stop the machine from leaking. We advise contacting a professional to address leaks.
- Slow draining: A slowly draining garburator is usually caused by a clog in your drain. You’ll need to clear the drain trap of any obstructions to fix this problem.
DIY Steps You Can Try to Fix Your Garburator
Though many garburator repairs are best left to professionals, there are a few DIYs you can try.. Follow the below steps to try to repair your garburator:
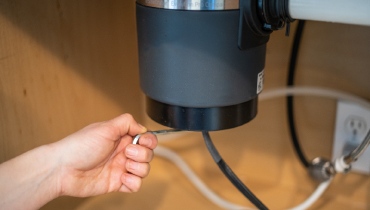
- Unplug the garburator: For safety purposes, always unplug your garburator before attempting any repairs. Usually, the cord and outlet can be found under the sink. If you are unable to locate them, contact a professional.
- Reset the garburator: After unplugging the garburator, press the red or black “reset” button on the bottom of the appliance.
- Check for a broken fuse: If pressing “reset” doesn’t work, check for a blown fuse or a tripped circuit breaker. Reset the breaker if this is the issue.
- Unjam the garburator: If the garburator is jammed, you can try to clear it via an accessible area on the bottom of the device. After unplugging the garburator, use a hex wrench to free the jam by spinning the grinding chamber. If your model doesn’t have this accessible area, contact a professional
When to Contact a Professional for Garburator Repair
If the above steps do not work, call a professional. Garburators are complex appliances, and erring on the side of caution can prevent the situation from worsening.
In particular, if the garburator has faulty hoses, wiring issues, or other damage, you shouldn’t attempt to repair it. These issues pose a safety threat and should always be handled by a professional.
How Do I Properly Use a Garburator?
Once your garburator is fixed, you can avoid issues through using the appliance correctly. Most issues arise from people treating their garburator as a trash can. In truth, it is only designed to handle a few different types of material. Here are the dos and don’ts on how to use a garburator properly.
These items DO go down the garburator:
- Many biodegradable food items – This includes food scraps, such as pieces of fruit, veggies, bread, or meat.
- Cut up pieces of larger food items – Ideally, throw them in one piece at a time to avoid clogging the garburator.
- Cold running water – Running cold water from the faucet while the drain operates causes any residual oil or grease to solidify so the grinder can chop it up before it enters the trap of the garburator.
- Dish soap – Squirting a little dish soap down the garburator, running the cold water, and letting it run for a minute is an easy way to clean the receptacle.
- Citrus – Grinding up orange peel or half of a lemon or lime leaves your garburator smelling fresh and clean.
The following items DO NOT go down the garburator:
- Glass, metal, plastic, or paper products – If a glass breaks in the sink, do not try to grind down even the smallest shards as this can lead to safety issues.
- Cigarette butts or anything combustible – These could jam the garburator or ignite sewer gas if you have a drain issue.
- Animal bones – Animal bones create clogs and can break your garburator’s blades.
- Coffee grounds – While not a problem for the garburator itself, the grounds may accumulate inside the pipe and lead to clogging.
- Large amounts of fat, oil, or grease – These can solidify and accumulate, potentially clogging your drain.
- Fibrous food items – Fibers from items such as cornhusks, onion skins, artichokes, and celery stalks can get tangled in the blades and motor or clog drains.
- Fish skins and eggshells – These should be thrown in the trash. Putting them in a garburator causes clogs and foul odors.
- Too many potato peels – Some peels are okay - too many may produce a thick, sticky paste that prevents the blades from working correctly.
- Expandable foods, including rice and pasta – when you add water, these items expand, which can lead to clogs within the garburator and pipes.
- Harsh drain cleaners and chemicals – These damage the garburator blades and pipes.
Call Mr. Rooter to Fix Your Garburator Today
For prompt and reliable garburator repair, turn to your local Mr. Rooter Plumbing. You can trust our local plumbing technicians to get the job done right the first time. Call us to schedule an appointment or request an estimate online today.